
Dining room table
My wife wanted to buy a new dining room table, but everything we looked at just looked mass produced and cheep. Nothing looked like anyone put any passion into it. Everything looked soleless. So because of this I was inspired to try and make one.
We just had our third kid and my time was limited, but I stopped my fabrication business and wanted a project. I needed something that was inexpensive, heavy duty, tested my skill and my wife would have to like it too (this is always the hardest criteria to hit). For the majority of the table I utilized scrap metal from passed jobs (some 6x6 square tubing with a 1/4” wall), some material from McMaster-Carr and some tempered glass for the top.
I drew pictures in my sketchbook of a few ideas. figured out how many people I wanted to seat and how much space a person takes up, realized that the most practical design was the most boring. I decided to come up with something different a little out of the box so to speak. It may not be the best use of space, but it was something that had some passion in it!! … and my wife liked it.
I modeled the table in Fusion 360 figured out all my dimensions and 3D printed a guide to draw out all of my cuts. Because all the pieces passed through the middle it made for a very complicated cut so that each square tubing would match up perfectly with its other mating pieces while making it look like the pieces passed through each other.


I was running a little short on material so I needed to start being creative. I feel like sometimes when your are given lots of constraints, you are forced to think of something that can become beautiful. I had cut pieces and attached small sections of off cuts so that i could get the exact lengths that I needed. Some 1/2” square bar from a railing job I did became the space in between a section of leg that there was no more material left for. I thought about putting a wine holder in there but later decided not to because it would just be something for the kids to mess with.


I don’t have a fixture table but came up with some interesting ways to make sure that everything came out level and true with what I had laying around. I used some scissor jacks, wood, and some kant-twist clamps. I also used a laser to make sure that everything was the same height.


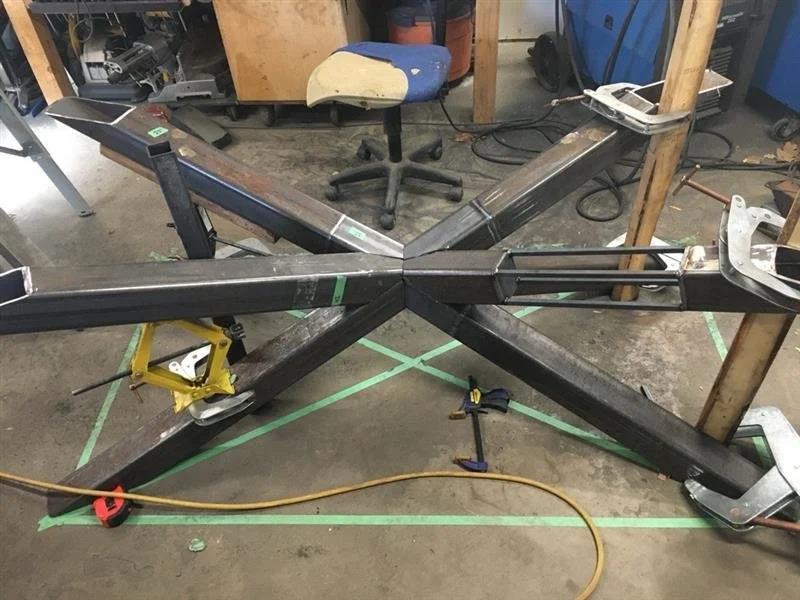
I welded some plates to the bottom and top of the open square tubing, and decided to add something to fasten a table top to if I ever decided to attach the base to something. I welded in some round tubing to seal everything up and counter bore the spot where the bolts would be.


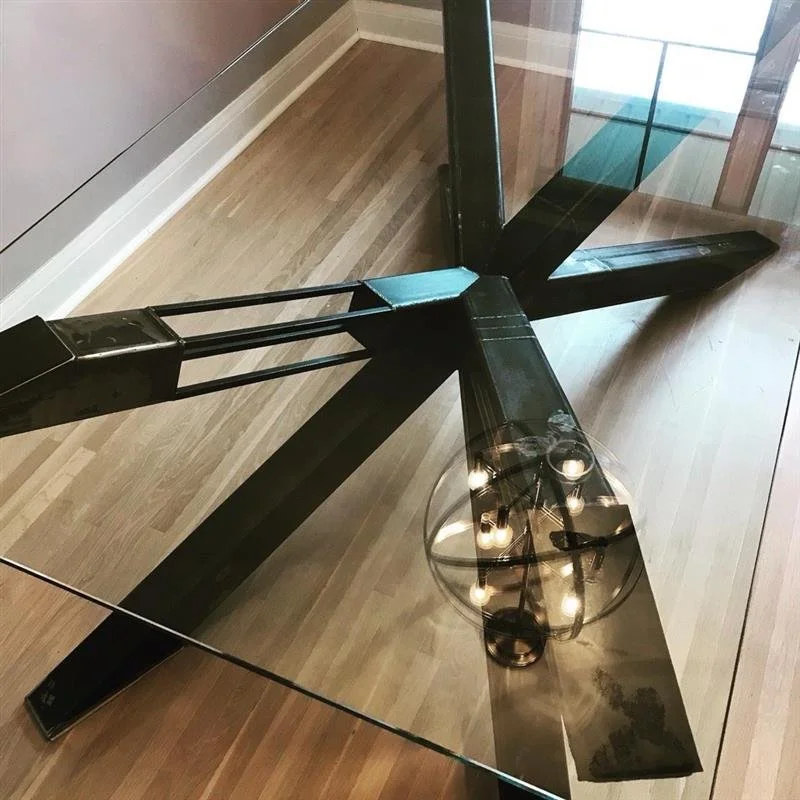
After everything was tacked up and I finished making the holes for the table top I finish welding everything up. I TIG’ed everything to make sure my welds looked pretty. I didn’t want to weld and grind smooth because I like the look of some nice TIG welds.


My Base was done!! I made some rubber pads to go between the glass and the base. Picked up my tempered glass. Put some felt pads on the bottom of the table so it didn’t damage the floor and moved it into the house to its final home. When it was in place I rubbed some oil on the raw metal to darken it up and protect it from rust.


Industrial furniture metal table